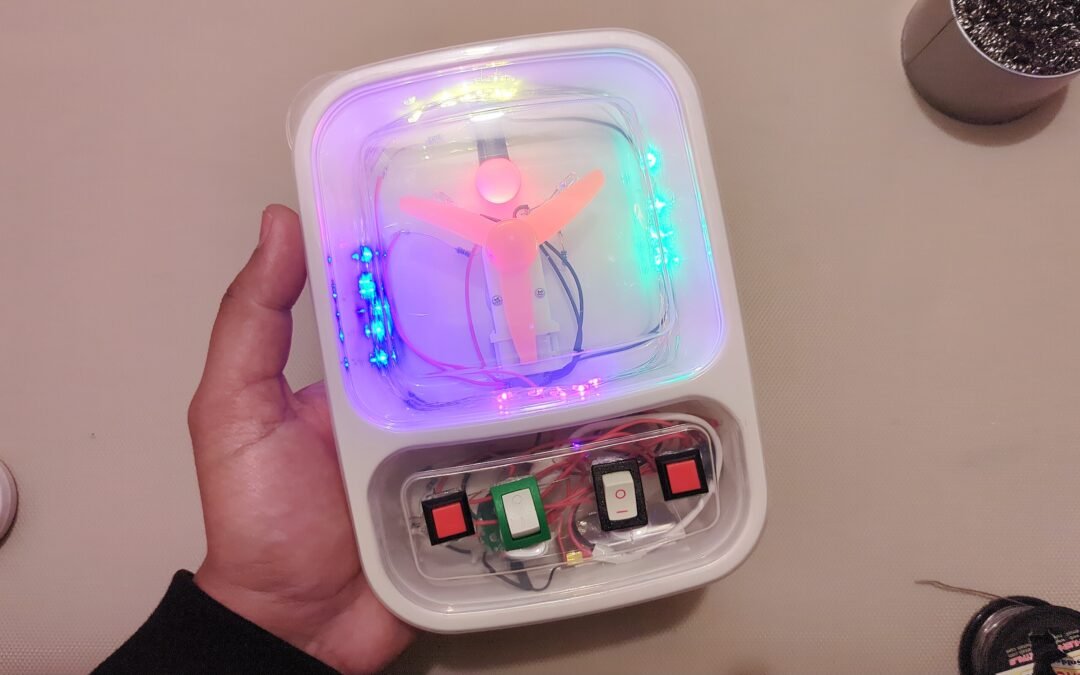
Create a fun and interactive mini busy box using switches, buttons, LEDs, motors, and a colorful light system. This sensory STEM project encourages curiosity, hands-on learning, and exploration of simple electronics in a safe and engaging way. ✨
Difficulty Level: Medium to Advanced
Concepts: Electronics, Electric Circuits, Electronics Assembly
Materials List
- Two-compartment plastic lunch box
- 2 on/off switches
- 2 momentary push buttons
- Small gear motor
- Plastic fan blade
- Red 5mm LED
- Green 5mm LED
- White 5mm LED
- Yellow 5mm LED
- Colorful LED string light with driver
- Vibration motor
- Li-Po battery
- Electrical wires
- Hot glue gun
- Soldering tools
- Drill or cutting tools for switch openings
How It Works 🎛️
🔴 Switch 1
- Controls the red LED light.
🌪️ Switch 2
Controls:
- Gear motor with spinning fan
- White LED
- Green LED
🌈 Push Button 1
Controls the colorful LED string light driver:
- ON
- DIM
- BLINK
- OFF
📳 Push Button 2
Controls:
- Yellow LED
- Vibration motor
Steps
- Prepare the box
- Use a plastic lunch box with two compartments.
- Mark component positions
- Decide where switches, buttons, LEDs, and fan will be placed.
- Cut openings carefully
- Make holes for switches, LEDs, and the fan motor.
- Install the switches and buttons
- Secure all controls in place.
- Mount the gear motor and fan
- Attach the fan blade onto the motor shaft.
- Add LEDs and string lights
- Position lights around the upper compartment for a glowing effect.
- Install the vibration motor
- Secure it firmly so vibrations can be felt through the box.
- Connect the wiring
- Wire each control to its assigned LEDs or motors.
- Connect the battery
- Attach the Li-Po battery safely.
- Test all functions
- Press buttons and flip switches to explore different effects. ✨
Science Behind It
This project teaches several important STEM and electronics concepts through interactive play.
Electric Circuits ⚡
Each switch completes a circuit, allowing electricity to flow to different components.
LEDs (Light Emitting Diodes) 💡
LEDs convert electrical energy into light very efficiently.
Different LEDs create different colors and effects.
Electric Motors 🌪️
The gear motor converts electrical energy into motion, spinning the fan blades.
Vibration Motor 📳
The vibration motor spins an off-center weight, creating movement and tactile feedback.
Input and Output Systems 🎛️
Buttons and switches act as:
- Inputs
Lights, motors, and vibrations act as:
- Outputs
This is similar to how real electronic devices and machines work.
Learning Highlights 🧠
- Understanding switches and circuits
- Exploring cause and effect
- Learning about motors and motion
- Discovering sensory feedback systems
- Hands-on electronics experience
- Fine motor skill development
Safety Notes ⚠️
- Adult supervision recommended during assembly
- Avoid short-circuiting the battery
- Use low-voltage components only
- Secure all wires properly
Watch the video!
Keywords: busy box for kids, DIY sensory toy, button box STEM project, electronics activity toy, DIY busy board, interactive toy project, STEM sensory box, homemade fidget box, switch and LED project, DIY electronics for kids